Baking A Better Cake
When I bake for my clients and my family I use a cake mix. I do that for a few reasons. They are cheap ($.88-$1.25), it saves me time (no measuring), they come in a ton of flavors, and I can add to them to make them better.
When I set out to improve on the standard cake mix I wanted to get a better cake without adding cost. Here are a few things I do to make the standard cake mix much better and easy to use for cake decorating.
- Add more oil. Most mixes say to use 1/3 cup oil. I always add 1/2 cup. This makes the cake more moist. (If the cake mix already uses 1/2 cup I do not add more).
- Eggs. Set your eggs out on the counter to get them room temperature. Or warm them up in dish of warm water (not hot) for 5 minuets before you mix them in. I also always crack my eggs in a separate dish. This way if you have a shell drop into the dish you can see it and get it out.
- Don't over mix. When you mix all the ingredient together just mix to combine. The cake mix instructions tell you to mix for 2 minuets, this is not good advise. Use a whisk and stir until the wet and dry ingredient are combine. There should still be some small lumps, that's OK. Why? The more you mix the tougher and drier your cake will be.
- Always grease and flour your pan. It's important to do this and not use cooking spray. Using cooking spray leaves you with a surface that will crumble when you try to buttercream the cake. I use a thin layer of Crisco to coat the pan and then I lightly dust it with flour.
- Watch your baking time. When you put your cake into the preheated oven set your timer to the lowest time on the box. Example: If the box says 30-35 minuets set the timer to 30 minuets. Check it at 30 minutes and watch carefully until it's done. I don't use the toothpick method of checking the cake. I watch and see for when the center "sets." When you touch a cake in the oven (with a oven mitt on) it will wiggle in the middle. When the cake is done it will not wiggle anymore, the middle will be firm. If you are more comfortable with the toothpick method it's fine to use, this is just what I do. I also try to trust my nose. When the house has the wonderful baking cake smell, you are close to done.
- Freeze the cake. After you bake and cool the cake on a cooling rack, wrap it tight in Saran wrap. Put it in the freezer for 24 hours. Frozen cake is really easy to buttercream and stack. This does not affect the cakes taste, it even makes the cake taste more moist. Freezing cake can also save you time. You can bake the cakes ahead of time. I sometimes have frozen cakes up to a week with great results. I have read you can freeze cake up to a month but I want to make sure I have excellent product so I don't push it more that. Just make sure your Saran wrap it tight.
- Stacking and Icing the Cake
- My cakes are 2-3 layers under the fondant. After you bake a cake it will have a bit of a dome on the top. You need to level the top in order for your cake to stack properly. I use a serrated bread knife and just eyeball it as I cut the top off. You can also buy a cake leveler at Michael's, or another store with cake supplies.
- Level each of your cake layers.
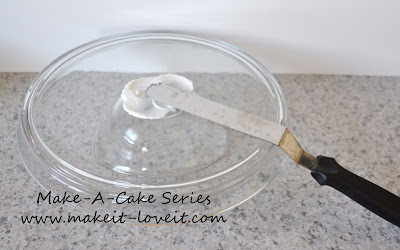
Take a small amount of buttercream and and spread it in the middle of your cake plate to secure your cake. This will keep it from sliding when you move it.
The spatula in the picture is key. It's an icing spatula and is an essential part to cake decorating.
Turn your cake over so the top (the cut side) is on the cake plate.
Distribute a layer of buttercream onto your cake and spread it evenly.
Turn over your second layer and place it on top of the first.
Take buttercream and spread it over the top of the cake.
Push some buttercream over the side to start icing.
Change the direction of the spatula and spread the buttercream over the sides.
Spin the cake stand around to get the whole cake.
Make sure to get it in the crack between the two layers.
Make the layer of buttercream thin. This is called the crumb coat. Let this sit for 10-20 minuets.
Then go back with more icing and put on a thicker layer.
Doing this keeps any crumb from being on the outside of the cake.
You do not see this when you cover with fondant but if you are just buttercreaming a cake, this step is helpful.
Spread the icing nice and smooth on top.
Now your cake is ready for fondant!
I hope this information wasn't too long.
I hope you received some tips that will make cake decorating fun for you!


No comments:
Post a Comment